Explore Gallery:
You may have seen a neighbors project, met us at a show, or seen pictures online. You may already know what you are looking for. But if you need some inspiration, then our gallery is a great place to start. Don’t worry about perfecting colors or styles, just get a sense of what you like and don’t like.
Online Estimate:
We encourage all customers to use our online estimate tool to get a ballpark estimate of our landscape borders. This is should help put in perspective how our beautiful, durable, and infinitely customizable landscape borders compare to other options you may be considering from a cost perspective.
Onsite Estimate:
The first step is to meet with the owner or one of our designers for a free consultation to decide on the best options for your yard. We'll take accurate measurements to give you a precise project cost. This meeting usually takes about 30 minutes. We'll discuss color choices and patterns that will enhance your property's appearance, ensuring you love your yard for years to come.
Second Meeting:
Before starting the job, our team will meet with you again to review the border layout. This ensures everyone is aligned for excellent customer satisfaction. We'll listen to your preferences and offer our expertise to design the borders that best complement your landscape.
Layout:
We mark the border locations with spray paint to show you the planned layout. Once you approve, we'll proceed with the installation of your new landscape borders.
Upon Arrival:
The crew leader will meet with the homeowner and go through all decisions made, or any other questions or last-minute changes the customer may have. We always want to make sure the job will installed to the customer's liking.
Prep Work:
Employees will be setting up all equipment and getting ready to start the process. You do not need to worry about a mess in your yard. The most substantial piece of equipment that goes through any yard is a wheelbarrow. We wlll also be hooking up our hose to the home water supply to mix the concrete.
Trenching:
We will follow the sprayed out area where the landscape border is going to be installed with our sod cutter. This is going to cut out the grass, making a path so the curb can be installed properly. The soil is ground up and pulverized making it great soil that can either be kept and reused to fill in bare spots in your yard or disposed of by our crew.
Mixing and Extruding of Cement:
Once all areas are trenched and prepped, the mixing process begins. At this point, we make our own blend of mixes making the strongest most durable concrete curb edging. The concrete mix is dumped into a wheelbarrow and taken to the curb machine where the cement will be extruded and finished to give it a final look. Also, during this process, cable reinforcement is placed through the center of the curb to protect from any harsh frost freeze cycles. This cable prevents the curb from separating and heaving, making the curb the most durable, longest-lasting curb on the market.
Finishing:
Having a strong finisher is a must when it comes to landscape borders and edging. Experience is a must for this crucial part of the job, making sure all concrete is free of voids giving the edging smooth, professional look. The landscape edging is troweled to perfection.
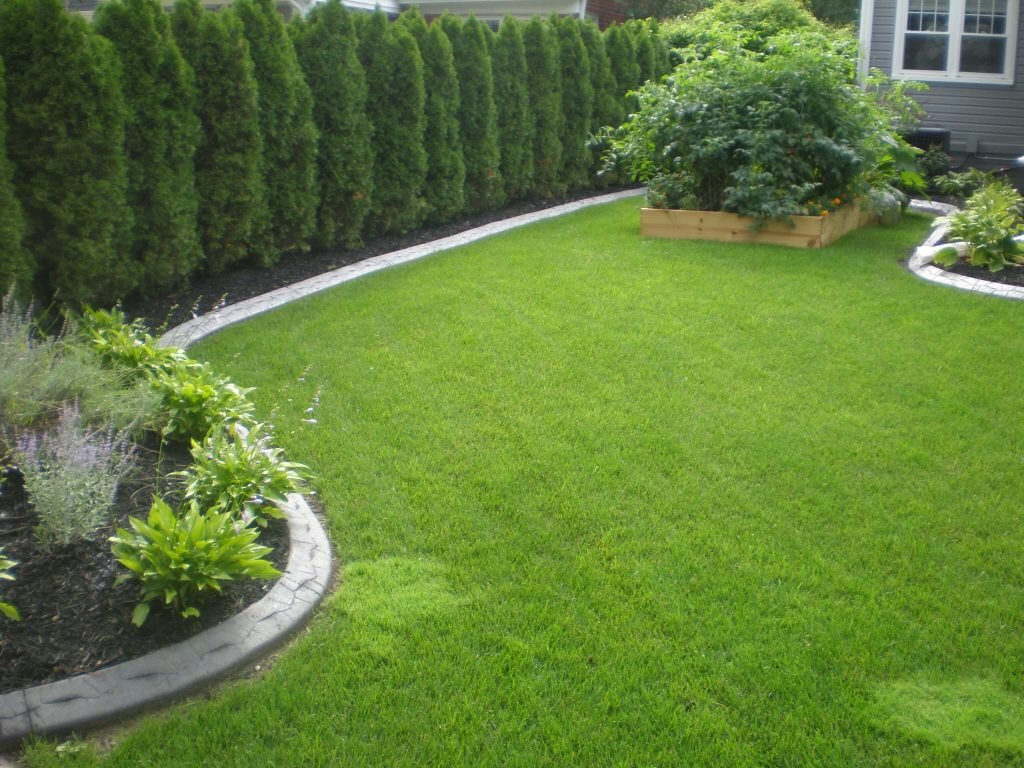
Stamping:
To give the landscape curb the best possible look, a variety of stamps can be chosen to best suit the looks of your house and surrounding landscape. All stamps are applied with a colored release agent to make the patterns stand out. Stamps are rolled on or carved in to achieve the selected style and appearance. This process takes place once the curb is installed correctly and finished.
Control Joints:
The next process is cutting in the correct spots to prevent cracking. These expansion joints are roughly 2 feet apart. They are allowing the some flexibility throughout the freeze-thaw cycle.
Sealing:
Sealing is the final process of installing landscape edging. Sealing is going to protect the curb from the sun's UV rays, traffic (feet, pets, tools, etc.) and prevent the color from fading. The sealing process should be repeated every two years to keep the curb protected and maintained. You can do this sealing process in the future or we can come back and do it for you.
Timeframe:
The entire process is typically completed in one day, except for sealing which is done once it has had enough time to dry and absorb our high-quality sealer.